
How To Install a New Attic Fan
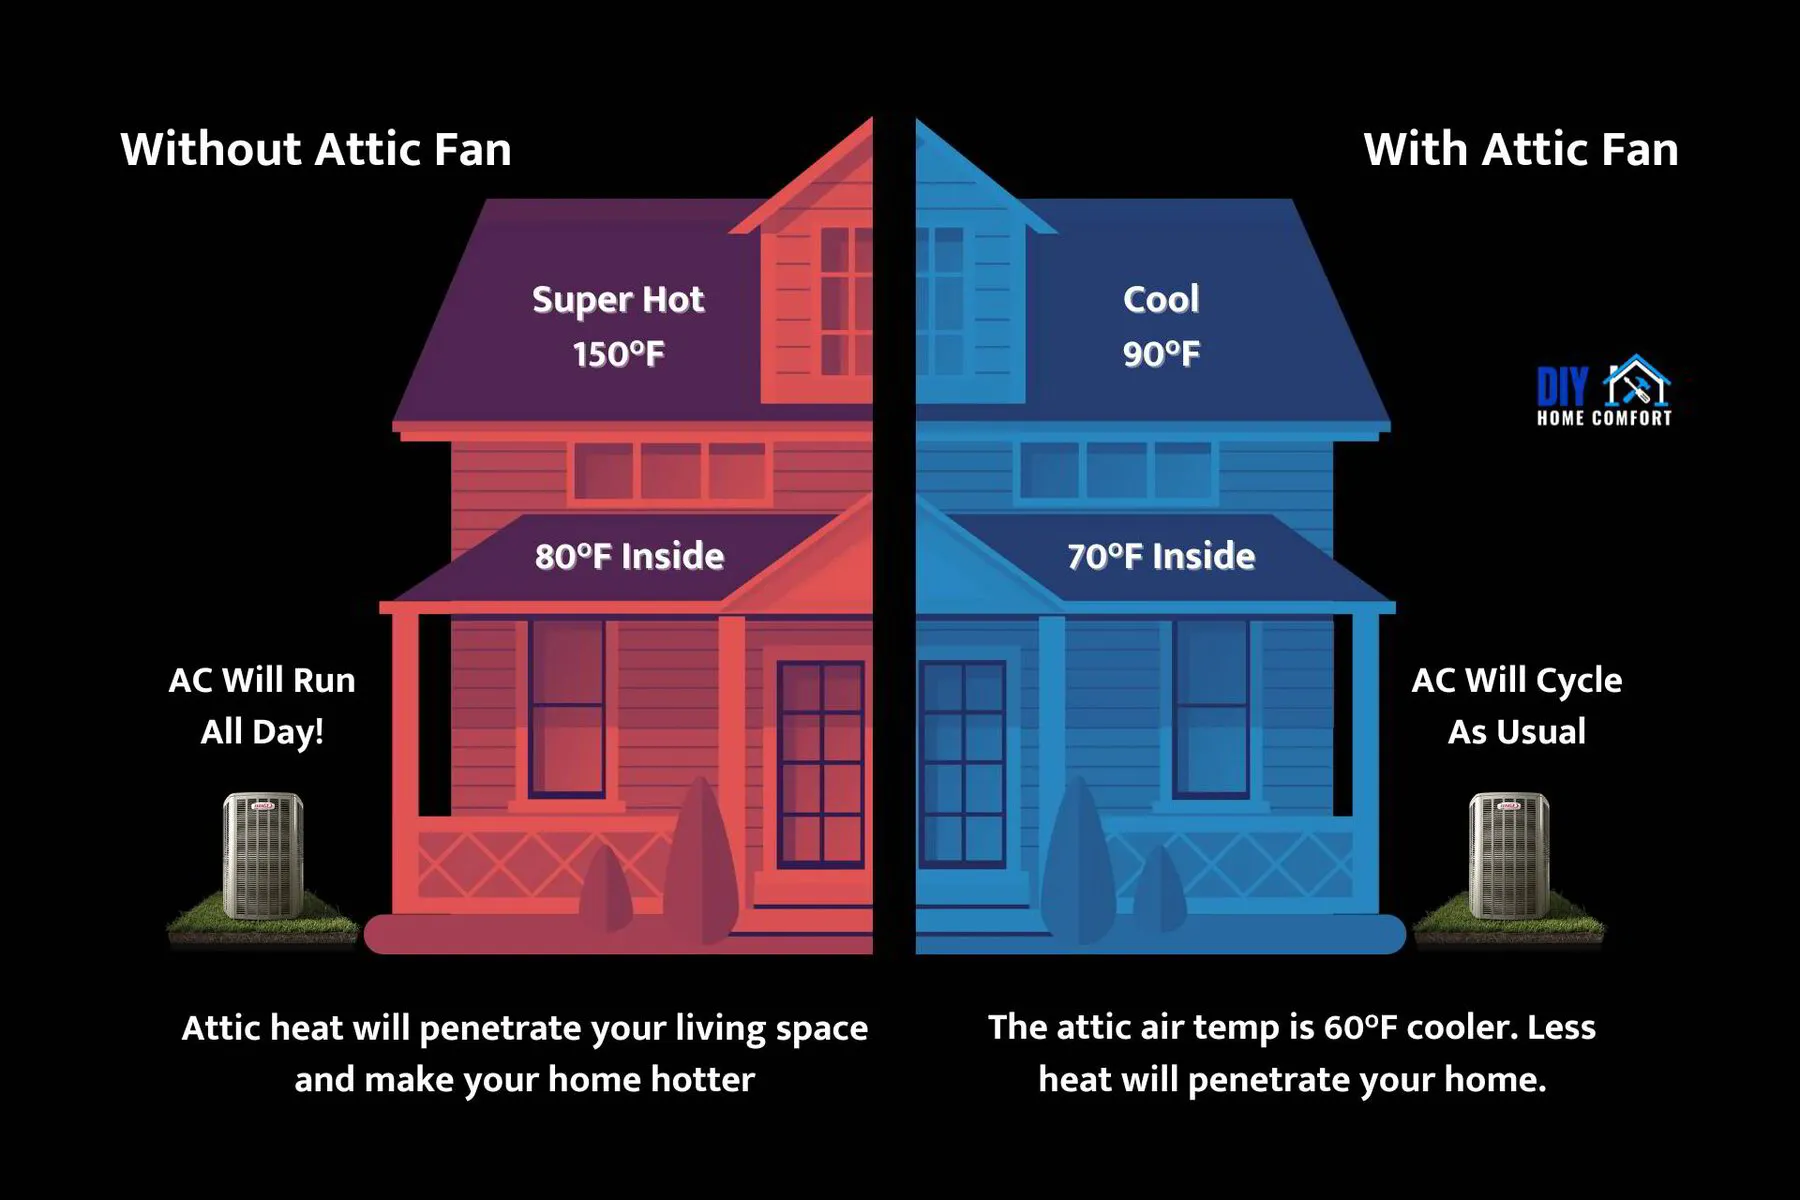
An attic fan installation enhances your home’s energy efficiency and overall comfort. By actively expelling hot air, attic fans moderate your home’s temperature, reducing the burden on air conditioning systems and consequently lowering energy costs. Installing a new attic fan by utilizing existing vents and following the manufacturer's instructions for wiring can further optimize these benefits.
Homeowners often install these systems not only for these common benefits but also for their ability to protect roofing materials from heat damage and to prevent moisture buildup that can lead to mold. This guide will walk you through the detailed steps of installing an attic fan, ensuring you can achieve these benefits through a successful DIY project.
Step 1: Choosing the Right Fan
When selecting an attic fan, here are some options to consider, categorized by type and features:
Solar-Powered Fans:
Pros: Eco-friendly, no operating costs, less invasive installation.
Cons: Less effective on cloudy days, typically less powerful than electric models.
Electric Fans:
Pros: Consistent performance, high power output.
Cons: Increases electricity usage and requires wiring.
Roof Mounted Fans:
Pros: Ideal for professional installation by roofers, ensuring proper sealing and shingle repair.
Cons: Requires cutting into the roof, which might not be suitable for all types of roofing materials.
Whole House Fans:
Pros: Circulates air throughout the entire home, pushing it out through the attic and can significantly cool down your home while potentially increasing its value.
Cons: Installation can be more complex and may require more significant changes to your home structure.
Features to Consider:
Built-in Thermostats: Automatically turns the fan on/off based on attic temperature.
Humidistats: Detects and responds to humidity levels, preventing mold growth.
Emerging Technologies:
Smart Attic Fans: This can be controlled remotely via smartphone apps and integrates with home automation systems for enhanced monitoring and control.
Each type and feature offers specific advantages that can be matched to the particular needs of your home environment and personal preferences for energy efficiency and convenience.
Step 2: Preparation
Before starting your attic fan installation, ensure you have all the necessary tools and safety gear.
Here’s a checklist to help you prepare:
- Attic ventilator panel
- Stud finder
- Drill with various bits
- Jigsaw or reciprocating saw
- Tape measure
- Screws (appropriate length and type for your fan and wall material)
- Sealant (weatherproof if installed on an exterior surface)
- Safety goggles
- Dust mask
- Protective gloves
- Long sleeve shirt to protect yourself from the insulation
Additionally, if your home has a gable roof, check the structure to ensure it can support the attic fan installation, particularly if you plan to install the fan in the gable-end wall. Be prepared for potential modifications to the exterior wall for gable-end attic fan installations.
🛑 SAFETY NOTE: Have a stable ladder to access your entire attic. Also, ensure all circuits are de-energized before you begin work to handle any electrical connections safely. Clear the workspace of debris and insulation for easy access and safety.
Step 3: Choosing the Right Installation Site for a Gable Vent
Selecting the ideal installation site for an attic fan is crucial for its efficiency and effectiveness.
🛠️ For gable-end wall installations:
- Assess Ventilation Needs: Identify areas in the attic that trap the most heat or have poor airflow. Consider the role of gable vents in facilitating crossflow ventilation and controlling humidity.
- Check Structural Integrity: Ensure the chosen wall can support the fan without structural compromise. Installing a gable fan may require a carpenter for structural changes or additional framework.
- Measure and Mark: Using a tape measure, find the center point of the gable-end wall. Use a level to mark a horizontal line across the midpoint, ensuring it’s high enough to allow for optimal air expulsion. Remember, the effectiveness of a gable fan heavily relies on proper air intake from gable vents to reduce moisture and heat buildup.
🛠️ For roof installations:
- Select the Right Spot: Choose a location away from overhanging trees and where sunlight can maximize solar fan efficiency if applicable.
- Consider Airflow: The fan should be placed near the ridge of the roof for maximum heat extraction. The positioning of gable vents in relation to natural airflow and prevailing winds should also be considered to enhance attic ventilation.
- Marking: Mark the installation spot accurately to ensure it aligns properly with interior rafters for support.
☑️ Practical Tips:
- Avoid placing the fan near bedroom windows to reduce noise disturbance.
- Ensure the location allows for straightforward ducting or venting to the outside, minimizing turns and bends for better airflow.
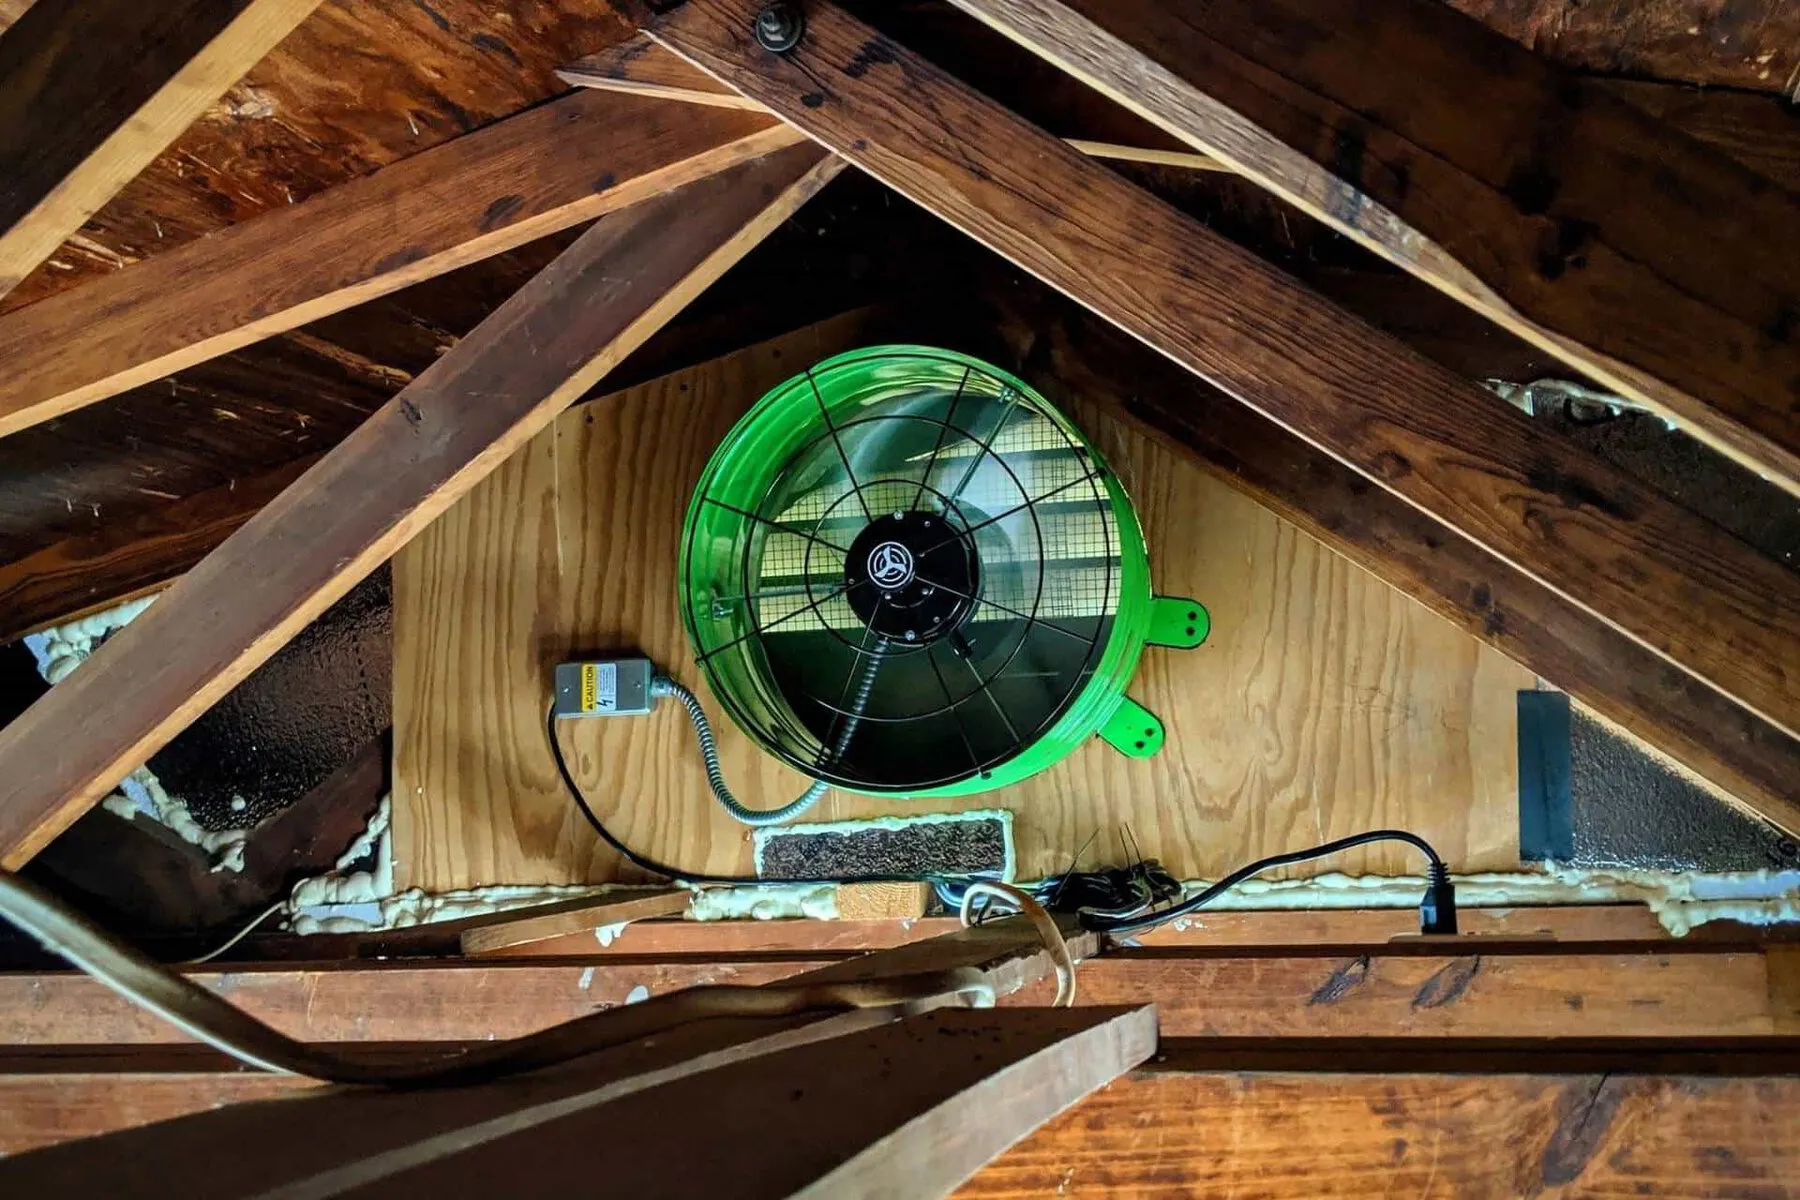
Step 4: Cutting and Mounting
To successfully cut a hole and mount an attic fan, follow these detailed steps:
- Safety First: Wear protective goggles, gloves, and a dust mask to safeguard against debris when cutting through materials like wood or shingles.
- Marking the Cut: Using the measurements from your fan’s installation template, mark the exact dimensions on the gable-end wall or roof.
- Cutting the Hole: Use a reciprocating saw for wood or a circular saw with a blade suitable for cutting through shingles and plywood. Cut slowly and steadily to maintain control and precision. Be cautious about the potential impact on the roof deck; improper cutting can lead to moisture problems, mold, or the need for roof deck replacement.
- Mounting the Fan: Place the fan in the cut hole to ensure it fits snugly. Use weatherproof screws to secure the fan into place, ensuring it’s tightly mounted to avoid vibrations. Proper sealing is crucial to prevent damage to the roof deck.
- Waterproofing and Insulating: Apply a bead of weatherproof caulking around the exterior of the fan to seal any gaps, preventing water ingress. For added insulation, surround the interior gap between the fan and attic material with expanding foam insulation, enhancing energy efficiency.
☑️ Extra Tip: Always check for obstructions like wires or pipes before cutting, and ensure the fan’s location allows for optimal air extraction based on the attic layout and natural airflow patterns.
If the installation process reveals or causes damage, consult a professional for roof repair to ensure the integrity of your roof is maintained. This detailed approach secures the fan and enhances its efficiency and longevity.
Step 5: Wiring the Fan
Wiring an attic fan correctly is crucial for safety and efficiency.
Follow these steps to ensure compliance with local electrical codes:
- Turn Off Power: Before starting, ensure the power is off at the main breaker box to prevent electrical accidents.
- Source Power: Typically, attic fans can be connected to an existing circuit, such as a nearby light fixture. Before proceeding, use a voltage tester to confirm the power is off.
- Install Switch or Thermostat: Follow the manufacturer's wiring diagram if your fan has a built-in thermostat. For manual operation, install a switch in an accessible location. Connect the wiring from the power source to the switch and the fan.
- Grounding: Ensure the fan is properly grounded to prevent electrical shocks. Connect the grounding wire from the fan to your home’s grounding system.
- Secure Connections: Use wire nuts to secure all connections and tape them with electrical tape. Make sure no bare wire is exposed.
- Check Local Codes: Always check your local building codes to ensure your wiring complies with all regulations, especially concerning circuit loads and proper insulation of exposed wires.
- Final Testing: Once everything is installed, turn the power back on and test the fan for proper operation.
☑️ Advanced Tip: If installing a solar-powered attic fan, ensure that the solar panel is positioned to receive maximum sunlight and connect it directly to the fan unit according to the manufacturer's instructions, typically involving less complex wiring than electric models.
Adhering to these steps ensures safety and enhances the fan’s performance. Always consult a professional if unsure about the wiring process or local code requirements.
Step 6: Testing and Troubleshooting
After installing your attic fan, test it by turning on the power and observing its operation. Listen for unusual noises or vibrations, which could indicate loose components or improper mounting. Ensure the fan turns on at the set temperature if equipped with a thermostat.
Common issues include:
- Vibrations: Check all screws and mounting brackets to ensure they're tight.
- Noise: Ensure nothing obstructs the fan blades and that it's mounted securely.
- Operational Inefficiency: Verify that the fan is the correct size for your attic space and that all vents are unobstructed.
For maintenance, regularly clean the fan blades and check electrical connections to extend the fan’s lifespan and maintain efficiency.
Conclusion
This guide has walked you through the crucial steps of attic fan installation, from preparing and choosing the right fan to detailed installation and wiring procedures. We also covered essential testing and troubleshooting tips to ensure your attic fan operates efficiently and effectively.
At DIY Home Comfort, our commitment is to provide expert advice and thorough guides on HVAC solutions, leveraging our extensive experience in home improvement. We invite you to explore our other insightful HVAC articles for more in-depth knowledge and practical tips. Enhance your home’s comfort and efficiency today by visiting DIY Home Comfort.

Scott Harding
Scott is the main author of DIY Home Comfort. He's also an experienced HVAC technician that enjoys home renovation and spending time with his family. You can find out more about him here.